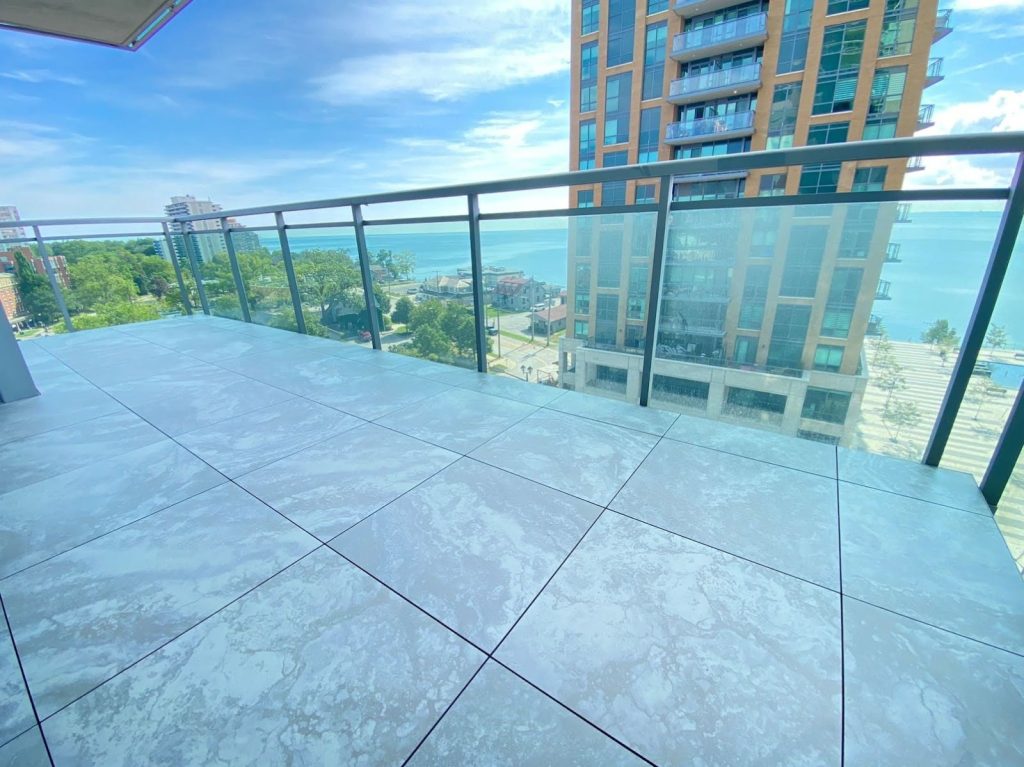
Most Toronto condo balconies arrive the same way: grey concrete, a glass railing, and a drain in the corner. A good condo balcony design turns that slab into a room you actually use from May to October. This guide is a condo balcony makeover plan in six steps, in the order that saves you money and headaches: rules first, then layout, privacy, lighting and plants, and finally the floor that ties it all together.
If you already know you want to cover the concrete, skip ahead to Step 6 or see our condo balcony flooring installation page. If you just want floor looks to compare, start with our balcony flooring ideas.

Before you start: approvals, measurements and budget
Ten minutes on these questions now saves a returned order or a letter from management later.
- Approvals: Have you asked your property manager what the building allows on balconies (flooring, screens, planters, BBQs, lights)? Is there a written process or form?
- Measurements: Do you know the balcony’s size, the door sill height, the railing height and where the drain is? Step 2 covers each one.
- Use: What is the one thing you want to do out there: morning coffee, dinner for two, reading, a spot for the dog?
- Budget: Which items are long-term (the floor, good furniture) and which are seasonal (cushions, annual plants)? Spend on the long-term items first.
Step 1: Check your condo rules before you buy anything
In Ontario, your balcony is usually not part of your unit. The Condo Authority of Ontario says balconies and other exclusive-use common elements “are owned by the corporation but owners can use them exclusively”, and that most owner-proposed changes need board approval and a formal section 98 agreement. Your building’s declaration sets out which areas are exclusive use, so check it.
That matters because under section 98 of the Condominium Act, 1998, an owner can change the common elements only after the board approves it by resolution and the owner and corporation sign an agreement. That agreement covers who pays for the change and for repair, maintenance and insurance afterwards. Boards also make rules about how common elements are used (section 58).
Whether loose-laid floor tiles count as an “alteration” depends on the building. Many boards ask owners to apply first, so ask your property manager before you order.
Two more rules to check while you’re asking:
- Furniture and wind. Many buildings have balcony furniture rules. For example, the rules of TSCC 2302 (The Bridge) allow “only seasonal furniture” and require items to be secured so they can’t be blown off by high winds. The same rules ban awnings or shades without board consent.
- Barbecues. Toronto Fire Services says it “does not regulate or enforce the use of BBQ’s on condominium and/or apartment balconies”, so your building’s rules decide (City of Toronto). If propane is allowed, follow the TSSA safety rules: the balcony must be open, the cylinder stays on the balcony connected to the BBQ, and you bring cylinders up in the service elevator. Keep wood tiles, turf and cushions clear of the grill.
Step 1 checklist
- Read the balcony section of your declaration and rules.
- Ask management what needs approval: flooring, screens, anything attached.
- Get any approval in writing.
- Check the BBQ policy before you buy a grill.
Step 2: Measure, clear and check the drain
Clear everything off and wash the concrete so you can see what you’re working with. Then measure:
- Length and width, plus any jogs, curves or angled ends. Odd shapes are fine: Skyscapes designs flooring for balconies with curves and angles (FAQ).
- Door sill height above the concrete. This limits how thick your new floor can be before it reaches the sliding door track.
- Railing height from the concrete to the top of the rail. You’ll need this in Step 6.
- Drain location and which way the slab slopes. Water needs to reach that drain, and nothing you add should block it.
- Posts, columns and dividers that furniture and flooring must work around.
Plug your length and width into our square-footage calculator to get a sense of scale before you talk to anyone.
One more question: ask management whether balcony slab or railing repairs are coming. An article in CCI Toronto’s CondoVoice magazine describes a 15-storey condo where balcony tiles had to come off for slab repairs. Without section 98 agreements, the corporation was on the hook for removing them (Canadian Condominium Institute). Flooring that lifts out easily makes that much simpler for everyone.
Step 2 checklist
- Clear and wash the slab.
- Measure length, width, door sill height, railing height.
- Mark the drain and the slope.
- Ask about planned building repairs.
Step 3: Pick one main use and plan the layout
A common small-balcony mistake is trying to fit a dining set, a lounger and a garden into one small slab. Pick one main use and build around it.
Useful clearances from Houzz, including advice from landscape designer Amy Martin:
| Layout element | Space to plan for |
|---|---|
| Bistro set for two, with room to move | About 6 × 8 ft |
| Light-use path (for example, door to railing) | 2 to 2.5 ft |
| Coffee table to sofa or chairs | 24 in |
| Chaise lounge | About 80 × 24 in, plus 24 in (ideally 36 in) of access on one side |
| Love seat | 52 to 60 in long |
- Narrow balcony: run seating along the wall and keep a clear strip along the railing side.
- Corner or L-shaped balcony: an L-shaped or corner sofa uses the corner well and leaves the door clear.
- Small balcony: folding or stackable pieces and lighter colours make the space feel bigger.
Keep climbable things away from the railing. For buildings over three storeys (which covers most condo towers), Toronto’s property standards require balcony guards (railings) at least 1,070 mm high, designed so nothing between 140 mm and 900 mm above the floor will “facilitate climbing” (Toronto Municipal Code, Chapter 629). A bench, planter or storage box pushed against the railing can act as a step, so place those against the building wall, especially if you have children.
Step 3 checklist
- Choose one main use.
- Sketch the layout to scale, with the door swing and path.
- Keep benches and planters off the railing.
Already know your layout? Book a free in-home consultation and we’ll bring samples to your door.
Step 4: Plan privacy and wind protection
High floors get wind, and anything you add has to stay put.
- Choose slatted or perforated screens over solid ones. A solid panel acts like a sail. UK garden designers Bowles & Wyer suggest screens about 40% open. They say a solid screen shelters about two times its height behind it, while a perforated one shelters about five times its height.
- Skip the parasol on a windy balcony. Bowles & Wyer warn that parasols “blow around in high winds”, and a loose one is a real hazard from a high floor. Check your rules too: some buildings, like TSCC 2302 above, need board consent for awnings or shades.
- Don’t drill into the slab or walls without approval. Freestanding screens weighted by heavy planters, or clamp-on brackets your building has approved, avoid that problem.
- Use heavy furniture. Heavier pieces, or pieces you can fold and store in a storm, follow the “secure your items” rule most buildings have.
- Try a living screen. Tall, sturdy planters along the side wall give privacy without a sail.
Step 4 checklist
- Get screen products approved first.
- Choose slatted over solid.
- Choose furniture that won’t move in a gust.

Step 5: Add lighting, plants and the finishing layer
Lighting
- Use one colour of light. Pick warm white (or cool white) for every fixture so the colours match. Mixing the two looks messy.
- Layer it: one soft overall light (string lights or a wall lantern), one task light where you eat or read, and one accent near the plants or the floor edge.
- Build lights into the floor. Skyscapes LED deck lights come in flush, rimmed and puck styles, with “plug and play” cords that hide under the tiles. You can choose from 8 to 78 lights to suit the space.
Plants
- Check your rules first. Ask management what your building allows for planters before you buy big ones.
- Use light potting soil in pots with drainage holes. That’s the advice in the Toronto Master Gardeners container guide, which also warns that gravel or broken pottery in the bottom of a pot can make drainage worse.
- Check the soil often in summer. Wind dries pots out, and the balcony above yours may keep the rain off.
- Keep plants low and steady. Group compact, sturdy plants in corners and against the building wall. Tall plants in light pots tip over in a gust.
Pets and texture
A strip of artificial turf gives a dog a spot of its own or softens one corner. Skyscapes offers 12 turf options, installed on removable panels and not glued or fastened to the surface.
Step 5 checklist
- Use one colour temperature for all lights.
- Use lightweight soil and pots that drain.
- Group plants away from the railing.

Step 6: Lay the foundation: cover the concrete
You plan the floor last, but it goes in first, and it changes the whole space more than anything else on this list. Bare concrete is cold underfoot, stains easily and makes even good furniture look temporary.
For condo balconies, the floor should do four things:
- Float, not stick. Skyscapes balcony tiles snap into an interlocking base. Skyscapes uses no “glue, grout, staples, or nails”, so nothing goes into the slab (balcony flooring).
- Drain. The base “allows for water, dirt, and snow to drain”, so your slab still sheds water to the drain you marked in Step 2. This matters: the CCI article above notes that water trapped under tile keeps a slab wet and can make concrete damage worse.
- Come up when needed. The tiles are “interlocking for speedy uninstall and reinstall, even when you move”, which helps with building repairs too.
- Stay low. Thinner systems keep you under the door sill and keep more railing above the new surface.
A note on railing height. Raising the floor makes the railing shorter from where you stand. In the CCI case above, tile and its setting bed made the guards about 1 inch shorter, and in some suites that made them non-compliant with the 1,070 mm minimum from Step 3. As a simple example, a railing that measures 1,090 mm from the concrete ends up 1,040 mm above 50 mm of new flooring. Compare your railing measurement with the floor’s total thickness, and if it’s close, ask your property manager before you order. Skyscapes describes its low-profile porcelain pavers as “Ideal for railing bylaw height restrictions, door thresholds” (porcelain pavers).
Match the floor to the design you planned
| If your plan from Steps 3 to 5 is… | Consider | Why it fits |
|---|---|---|
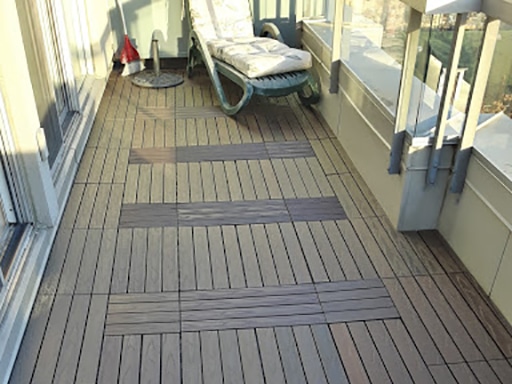
| Low-fuss, warm wood look with any furniture style | Composite deck tiles | Our best seller. “A simple clean” keeps them looking new, with no sanding, staining or sealing. |
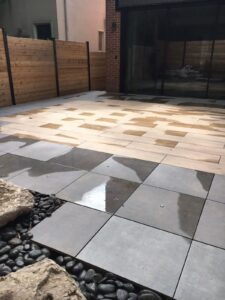
| Sleek and modern, or tight on door sill and railing height | Porcelain pavers | Stone, marble and wood looks; stain, scratch and fade resistant; low-profile pedestals for condo balconies |
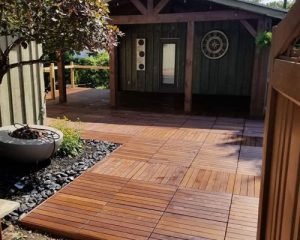
| Natural, cottage-style or plant-heavy | Exotic hardwood deck tiles (Ipe, Garapa, Curupay) | Real wood grain; oil no more than once a year if you want to keep the colour |
| A pet corner or a soft accent zone | Artificial turf | No watering; on removable panels |
Use the floor to support the layout. A staggered pattern draws the eye along a narrow balcony, and a two-tone band can mark the seating zone you chose in Step 3. For every look side by side, see our balcony flooring ideas and balcony materials guide.

How the install works. Skyscapes brings samples to every free in-home consultation in the GTA. Installation typically takes one day, and most balconies are done 1 to 3 weeks after the consultation (balcony flooring, FAQ). Estimates include labour, materials and clean-up. If you’d like to see the finished space before you commit, our rendering process turns a photo of your balcony into a design with your chosen tiles.
Step 6 checklist
- Choose a floating, removable system that drains.
- Check the total floor thickness against the door sill and railing.
- Pick the material and pattern in person, with samples, in your own light.
Bonus: protect your balcony for winter
- Furniture and BBQ: Skyscapes shrink-wraps furniture, BBQs and patio heaters on site. The wrap is vented to prevent condensation, so you skip the flapping tarp.
- Snow: keep the drain clear so meltwater has somewhere to go.
Condo balcony design FAQ
How can I make my condo balcony look better?
Start with the floor. Covering bare concrete with deck tiles or pavers changes the space more than any single piece of furniture. Then add one main seating area, warm lighting and a few sturdy plants grouped away from the railing. Check your building’s rules before you buy.
What can I put on a condo balcony floor?
Most owners choose floating systems that sit on the slab without glue or fasteners: composite deck tiles, porcelain pavers, hardwood deck tiles or artificial turf on panels. These can be lifted for building repairs or taken with you when you move. Your board may still require approval under section 98 of Ontario’s Condominium Act, so ask your property manager first.
Can I paint my condo balcony floor?
Balconies are usually common elements owned by the condo corporation, and changes to common elements generally need board approval. Ask your property manager before painting or sealing the concrete. Floating tiles are often the simpler route because nothing is applied to the slab.
How do I get privacy on a condo balcony without drilling?
Use freestanding screens held in place by heavy planters, or a row of tall, sturdy planters along the side wall. Choose slatted or perforated screens: about 40% open handles wind better than a solid panel, which acts like a sail. Get the product approved by your building first.
What furniture fits a small condo balcony?
Plan around one main use. A bistro table and two chairs need about 6 by 8 feet including room to move. On a narrow balcony, run seating along the wall, keep a clear path of about 2 feet, and choose folding or stackable pieces. Pick furniture heavy enough, or easy enough to store, that it stays put in high winds.
How long does a balcony makeover take?
The flooring is the longest part, and Skyscapes installations typically take one day on site, usually 1 to 3 weeks after the free in-home consultation. Furniture, lighting and plants can go in the same week.
Ready to start your balcony makeover?
Steps 1 to 5 are yours to plan. Step 6 is where we come in. Book a free in-home consultation in the GTA: we’ll look at your space, bring samples to your door and give you an estimate that includes labour, materials and clean-up. Warranties run from 10 to 25 years, depending on the product, and your estimate shows the one that applies.