Imagine transforming your cracked, uneven patio or walkway into a smooth, safe, and attractive space with minimal effort. The right exterior concrete leveling compound can help you achieve this result quickly, saving you time and avoiding the high cost of full slab replacement.
This comprehensive 2025 guide is designed to empower homeowners with up-to-date knowledge on exterior concrete leveling. You will learn how to select the best product, apply it correctly, and maintain your investment for years to come.
We will cover the essentials of leveling compounds, the critical factors in choosing one, step-by-step application instructions, common mistakes to avoid, and practical maintenance tips. Get ready to discover how simple it can be to restore and protect your outdoor surfaces.
Understanding Exterior Concrete Leveling Compounds
Transforming your outdoor spaces starts with understanding the role of an exterior concrete leveling compound. This section breaks down what these compounds are, their types, how they work, the benefits they bring homeowners, and important considerations before you begin. If you’re curious about how to address uneven, cracked, or aging concrete, these insights will help you choose the right solution for lasting results.
What is a Concrete Leveling Compound?
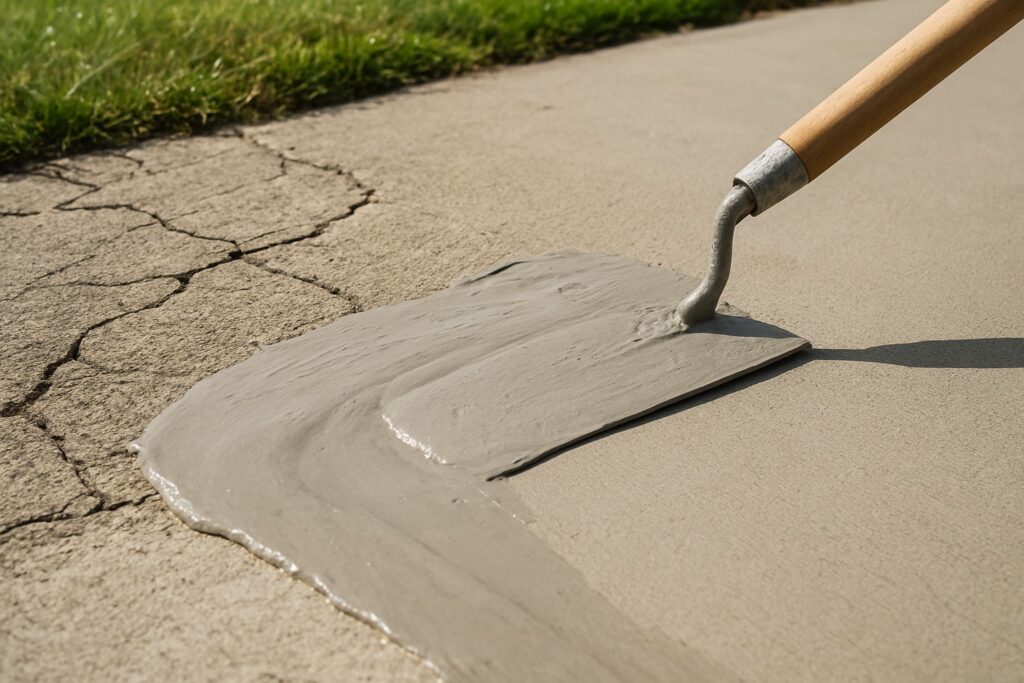
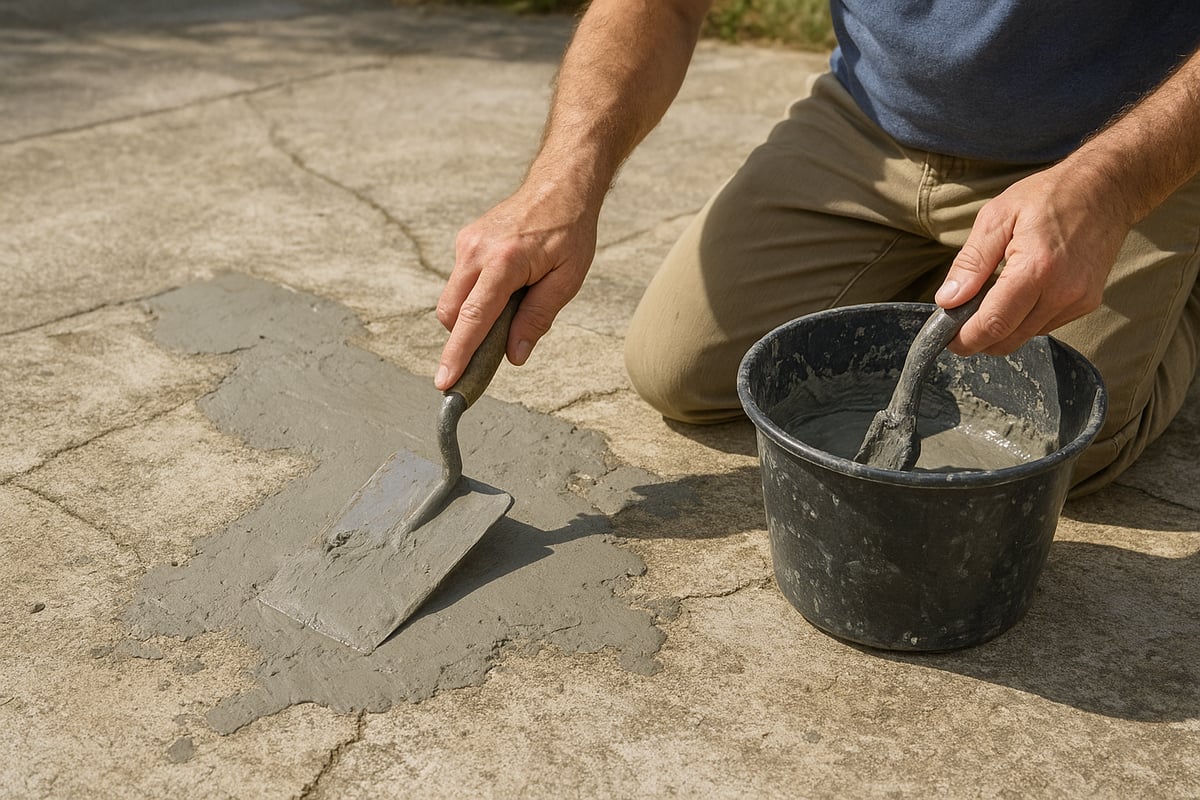
An exterior concrete leveling compound is a specialized mixture designed to restore uneven or damaged outdoor concrete surfaces. Unlike traditional patching materials, these compounds flow smoothly, filling low spots and minor cracks to create a level, seamless finish. There are two main varieties: self-leveling compounds, which spread out with minimal effort, and traditional types that require manual smoothing.
These products are ideal for patios, walkways, driveways, and pool decks. They address trip hazards, pooling water, and unsightly blemishes. Key features include exceptional flowability, strong adhesion, and resistance to weather extremes. For deeper insight into common issues and repair solutions, visit the Concrete Leveling Ultimate Guide.
Types of Exterior Concrete Leveling Compounds
Choosing the right exterior concrete leveling compound depends on your specific project needs. The two main categories are polymer-modified and cement-based compounds. Polymer-modified options offer added flexibility and improved bonding, while cement-based types are valued for their strength and durability.
Some compounds are fast-setting, allowing for quicker project completion, while others are standard-setting for larger areas. Products formulated for freeze/thaw cycles are essential in cold climates. Leading brands such as Mapei, Sakrete, and Ardex dominate the market, with exterior-use compounds experiencing steady growth from 2023 to 2024.
| Compound Type | Setting Speed | Weather Suitability | Top Brands |
|---|---|---|---|
| Polymer-modified | Fast/Standard | Freeze/Thaw Ready | Mapei, Ardex |
| Cement-based | Standard | General Exterior | Sakrete, Mapei |
How Leveling Compounds Work
The exterior concrete leveling compound works through a chemical reaction triggered when water is added. This process, known as hydration, causes the compound to bond tightly to existing concrete, creating a unified surface. Proper adhesion is achieved when the substrate is clean and primed.
Most products have thickness limitations, usually ranging from 1/8 inch up to 1 inch per application. For deeper repairs, multiple layers may be needed. Imagine a patio cross-section: the compound forms a smooth overlay, filling dips while maintaining structural integrity. Curing times vary, but following manufacturer guidelines ensures optimal results and long-term durability.
Key Benefits for Homeowners
Applying an exterior concrete leveling compound offers several advantages:
- Enhanced safety by eliminating trip hazards
- Improved curb appeal and increased property value
- A cost-effective alternative to full slab replacement
- Compatibility with overlays, paints, and modular outdoor flooring
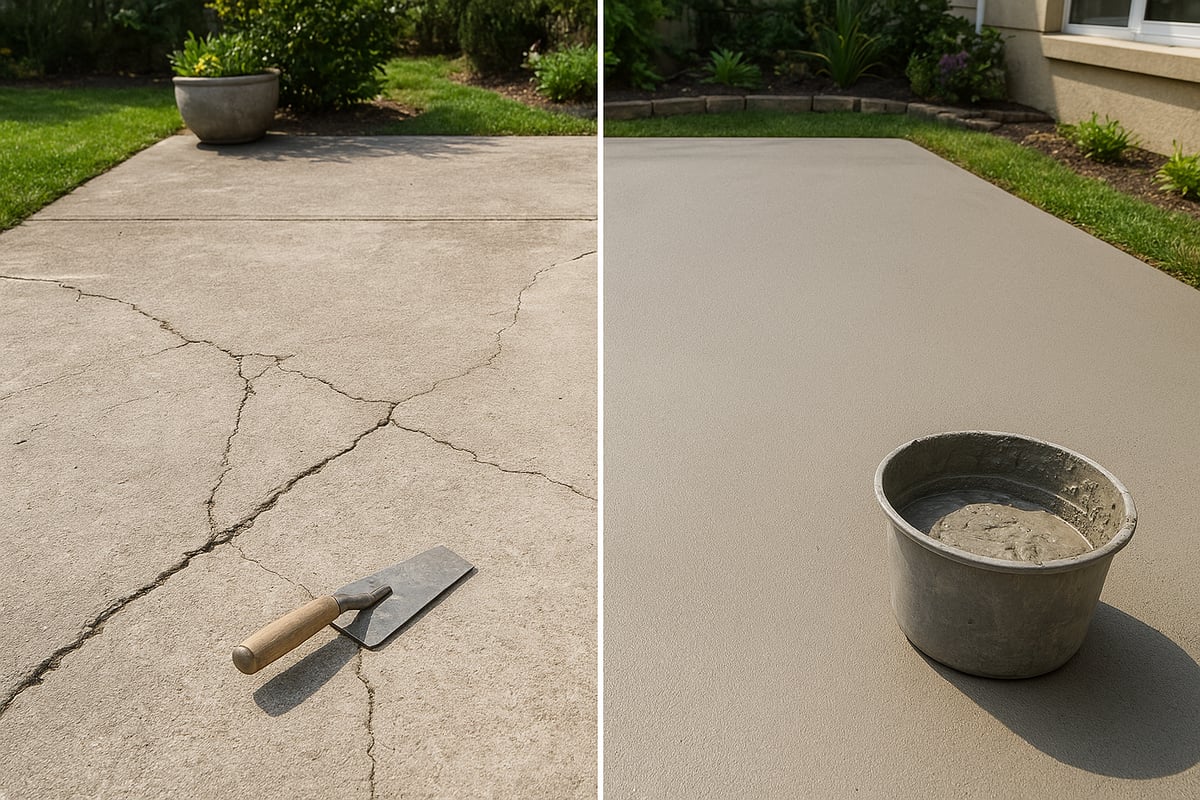
Real-world data shows that leveled surfaces can reduce accidents and boost home value. Before-and-after project statistics highlight dramatic improvements in both appearance and usability, making this solution appealing for any homeowner seeking a quick transformation.
Limitations and Considerations
While an exterior concrete leveling compound can resolve many surface issues, it is not suitable for major structural repairs or wide, deep cracks. Weather can impact application, as temperature and humidity influence setting and curing times. Always check the product’s requirements and local climate conditions.
Proper surface preparation is essential for maximum adhesion and lifespan. Most compounds last several years with routine maintenance but will need eventual touch-ups. Homeowners should assess whether their project is appropriate for a DIY approach or requires professional evaluation for long-term success.
Factors to Consider When Choosing a Leveling Compound
Selecting the right exterior concrete leveling compound is a critical step in ensuring a durable, long-lasting result. Homeowners need to evaluate their specific project needs, environmental conditions, and future plans for the surface. Let’s break down the essential factors for making a confident, informed choice.
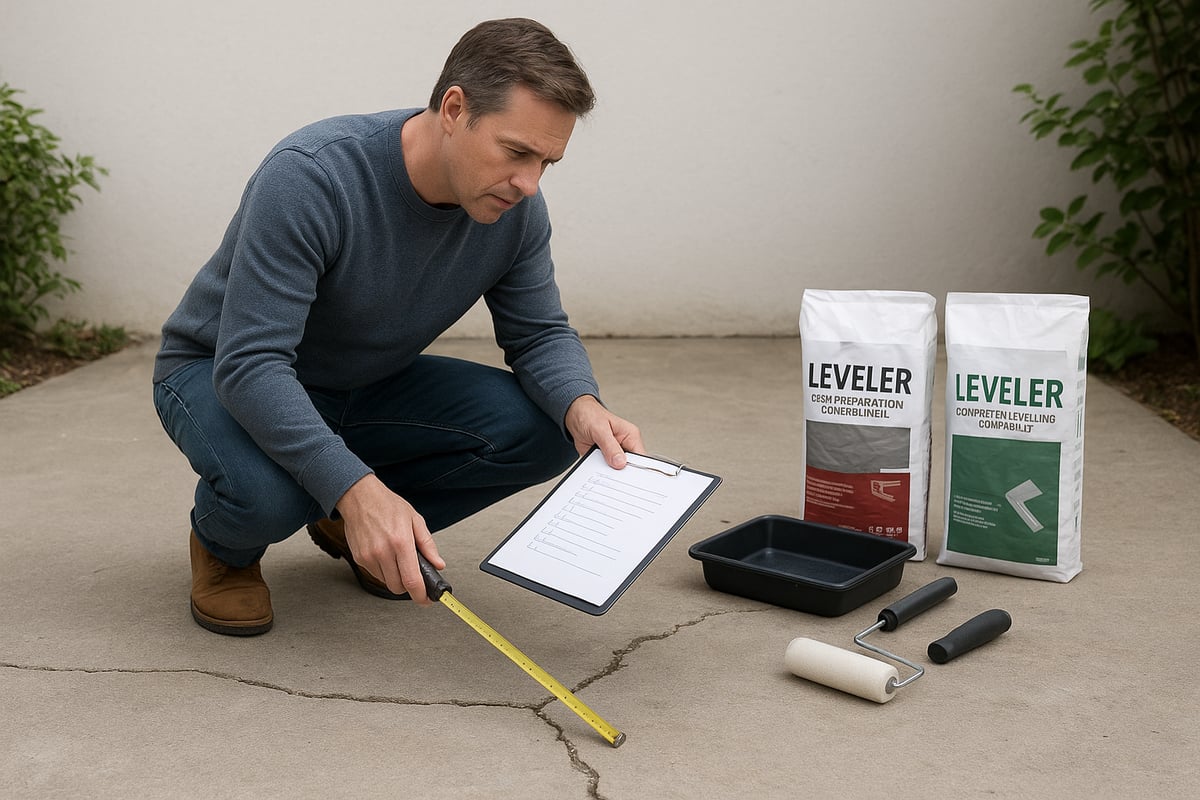
Assessing Your Concrete Surface
Before choosing any exterior concrete leveling compound, a thorough assessment of your surface is essential. Begin by identifying visible cracks, areas of spalling, or uneven spots that may pose safety risks. Check for moisture issues by placing a plastic sheet over the concrete and observing for condensation after 24 hours. Analyze drainage patterns to ensure water flows away from structures.
Use this checklist for effective evaluation:
- Inspect for cracks and spalling
- Test for moisture content
- Measure slope and grade for proper drainage
- Note any old coatings or debris to remove
A careful inspection helps you choose the most suitable exterior concrete leveling compound for your project’s needs.
Weather and Environmental Factors
Environmental conditions play a major role in the success of any exterior concrete leveling compound application. Temperature and humidity can impact curing times and final strength. For best results, choose a product rated for your local climate, especially if you live in a region with freeze/thaw cycles.
Look for compounds that offer UV resistance and are formulated to withstand rain, snow, and temperature swings. Applying the exterior concrete leveling compound during mild, dry weather reduces the risk of surface defects and ensures optimal performance. Always check manufacturer guidelines for minimum and maximum application temperatures.
Product Performance and Technical Specs
Comparing technical specifications helps you select the right exterior concrete leveling compound for outdoor use. Focus on compressive strength, typically 4000 psi or higher for exteriors, to support heavy loads and resist wear. Review the recommended thickness per pour, as most products have minimum and maximum limits.
Here is a quick comparison table:
| Feature | Typical Range |
|---|---|
| Compressive Strength | 4000–6000 psi |
| Thickness per Pour | 1/8" to 1" |
| Pot Life | 20–30 minutes |
| Curing Time | 4–24 hours (walk-on) |
Check for certifications or warranties, as reputable exterior concrete leveling compound brands often back their products for peace of mind.
Compatibility with Surface Treatments and Overlays
If you plan to finish your project with tiles, pavers, or outdoor flooring, verify that your chosen exterior concrete leveling compound is compatible with these materials. Some compounds are specifically designed to bond with a variety of overlays and surface finishes.
Proper adhesion is vital for long-term durability. For more detailed steps on preparing the surface for overlays, you can consult this helpful Outdoor flooring installation guide to ensure your leveling work supports future upgrades. Always follow manufacturer recommendations for primers and adhesives to maximize compatibility.
Cost, Coverage, and Availability
Budget and product availability are important when selecting an exterior concrete leveling compound. Prices typically range from $30 to $60 per bag, with coverage of 40–60 square feet at 1/8-inch thickness. Calculate your total area and desired build-up to estimate how much compound you need.
Compare local hardware stores and online suppliers for the best deals. Some brands offer discounts for bulk or contractor purchases. By understanding the cost and supply options, you can plan your project efficiently and avoid unexpected delays when sourcing your exterior concrete leveling compound.
Step-by-Step Guide: How to Apply Exterior Concrete Leveling Compound
Transforming your outdoor space is achievable if you follow the right steps for applying an exterior concrete leveling compound. This process not only enhances safety but also creates a smooth, attractive surface that stands the test of time. Each stage is crucial for a durable result, so let’s walk through the tools, preparation, mixing, application, finishing, inspection, safety, and when to call a professional.
Tools and Materials Needed
Before you begin, gather all essential tools and materials to ensure a seamless application of exterior concrete leveling compound. Having everything on hand avoids delays and helps achieve professional results.
Shopping List for a 200 sq. ft. patio:
| Item | Recommended Brands | Where to Buy |
|---|---|---|
| Exterior concrete leveling compound | Mapei, Sakrete, Ardex | Local hardware, online |
| Trowels (flat and margin) | Marshalltown | Hardware stores, online |
| Mixing paddle (drill attachment) | DeWalt, Bosch | Home improvement stores |
| Squeegee (long handle) | QEP, Kraft Tool | Construction suppliers |
| Safety gear (gloves, goggles, mask) | 3M, Honeywell | Safety supply stores |
| Surface prep cleaner | Simple Green, Zep | Home centers, online |
| Bonding primer | Mapei, Ardex | Flooring distributors |
| Buckets (5-gallon) | Any | Hardware stores |
Make sure your chosen exterior concrete leveling compound is rated for outdoor use and matches your climate needs. Proper tools and materials ensure a smoother, faster project with fewer mistakes.
Step 1: Preparation and Cleaning
Quality results begin with solid preparation. Start by removing all debris, loose concrete, dirt, and grease from the area. Use a power washer for deep cleaning and allow the surface to dry completely. This step ensures the exterior concrete leveling compound bonds well.
Inspect for cracks or joints. Repair hairline cracks with a compatible filler, and address joints with flexible sealant. For larger repairs, consider if the surface is suitable for a leveling compound or if structural fixes are needed.
Apply a bonding primer, following manufacturer instructions. Priming is vital for adhesion, especially on porous or weathered concrete. Allow the primer to dry fully before proceeding. Skipping this step can lead to poor bonding and early failure, so be thorough.
Step 2: Mixing the Leveling Compound
Mixing the exterior concrete leveling compound correctly is crucial for performance. Follow the manufacturer’s recommended water-to-powder ratio. Pour clean water into a mixing bucket, then gradually add the compound while mixing with a drill and paddle attachment.
Aim for a lump-free, pourable consistency—thick enough to flow but not watery. For large areas, mix in batches to avoid product setting before you use it. Consistent mixing ensures every batch performs the same across the entire project.
If you want a detailed, hands-on walkthrough of mixing and pouring, check out this Applying Self-Leveling Compound guide, which offers visuals and expert tips. Always double-check viscosity before pouring, as incorrect mixing can compromise the strength and finish of your exterior concrete leveling compound.
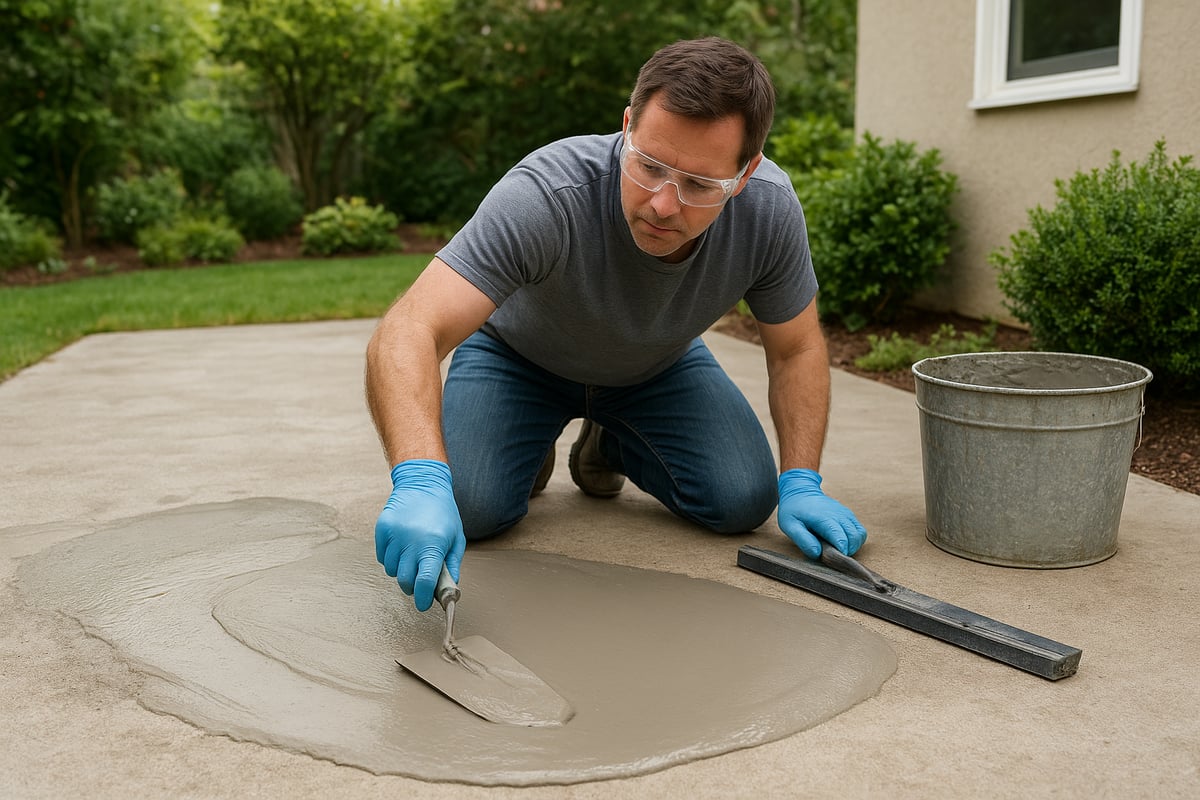
Step 3: Pouring and Spreading
Begin pouring the mixed exterior concrete leveling compound at the lowest point of your patio or walkway. Let gravity help the compound flow outward, then use a long-handled squeegee to guide and spread it evenly over the surface.
Work in small sections, blending each new batch into the previous one while the compound is still workable. Use trowels for edges, corners, and transitions to ensure complete coverage. For sloped walkways, spread the material upward and outward, maintaining a consistent thickness.
Managing edges is vital for a seamless look. Keep an eye out for pooling or thin spots. Adjust with extra compound as needed. Proper technique here makes the difference between a perfectly level surface and one with imperfections.
Step 4: Finishing and Curing
After spreading, immediately remove air bubbles by gently tapping the surface with a spiked roller or trowel. Smooth the compound, paying close attention to transitions and joints. This step defines the final appearance of your leveled surface.
Curing times vary by brand and weather conditions. Typically, initial set occurs within 2–4 hours, but full cure may take 24–48 hours. Protect the area from rain, direct sunlight, and foot traffic during this period. Check the manufacturer’s guidelines for walk-on and overlay times, as early use can damage the finish of your exterior concrete leveling compound.
Step 5: Post-Application Inspection
Once cured, carefully inspect the surface for levelness and uniformity. Use a long straightedge or level to check for low or high spots. Minor dips can be addressed with spot repairs, while raised areas may need light sanding.
Confirm that the finished surface slopes away from buildings to promote drainage. Address any issues such as cracks, delamination, or unevenness promptly to prevent future deterioration. Troubleshooting now ensures your exterior concrete leveling compound delivers lasting results.
Safety Tips and Best Practices
Prioritize safety throughout the project. Always wear gloves, goggles, and a dust mask when handling the exterior concrete leveling compound. Work in a well-ventilated area to avoid inhaling dust or fumes.
Dispose of unused compound and rinse tools promptly to prevent hardening. Clean up spills immediately to avoid slipping hazards. Common DIY injuries include skin irritation and eye exposure, so take precautions at every step.
If you’re unsure about a step, consult the product manual or seek professional advice. Preparation and caution are key to a safe, successful application.
When to Hire a Professional
Some projects are best left to professionals. If your surface has severe unevenness, covers a large area, or involves structural damage, hiring an expert ensures quality and safety. Professionals have specialized tools and experience with exterior concrete leveling compound applications.
Weigh the cost and benefits: DIY may save money for small, simple jobs, but complex or high-traffic areas benefit from professional installation. Vet contractors by checking references, licenses, and reviews. Ask for a written estimate and warranty before work begins.
A case study from recent homeowners found that professional applications often lasted longer and required fewer touch-ups than DIY projects. Consider your time, skill, and the scope before deciding how to proceed.
Common Mistakes and How to Avoid Them
Tackling an exterior concrete leveling compound project can be rewarding, but even small errors can lead to costly repairs. Homeowners often make preventable mistakes that affect performance, durability, and appearance. Understanding these pitfalls is key to achieving a smooth, long-lasting result.
Inadequate Surface Preparation
Proper surface prep is the foundation for a successful exterior concrete leveling compound application. Skipping cleaning steps or forgetting to use a primer leads to poor adhesion and rapid failure. Dirt, grease, or loose concrete left behind prevent the compound from bonding, often resulting in peeling or flaking after only one season.
To avoid this, always clear debris, power wash, and let the surface dry fully before starting. Use a high-quality bonding primer as recommended. For a detailed look at prep requirements, review this guide on surface preparation for outdoor flooring.
- Sweep and wash all areas.
- Fill cracks and joints.
- Apply primer uniformly.
A few extra minutes here can add years to your repair.
Incorrect Mixing or Application
An exterior concrete leveling compound needs precise mixing for optimal strength. Overwatering creates a weak, chalky layer, while undermixing leaves lumps that compromise finish. Pouring too thick or too thin can cause shrinkage and cracking. According to industry studies, improper mixing is a leading cause of failure in DIY projects.
Always follow the manufacturer’s water-to-powder ratio. Mix with a power drill for even consistency and batch large areas carefully. For more expert tips, see this overview on how to level concrete slabs.
- Measure water carefully.
- Mix until smooth and lump-free.
- Spread at the recommended thickness.
A little patience in this step ensures a strong, even surface.
Ignoring Weather Conditions
Weather has a significant impact on any exterior concrete leveling compound job. Applying in extreme cold or heat can disrupt curing, leading to weak spots or surface defects. Rain during cure time often causes bubbling or washout, while hot, windy days may dry the compound too quickly, resulting in surface blistering.
Check the forecast and only apply within the temperature and humidity range specified by the manufacturer. If rain is likely, postpone the project. Use temporary covers if needed to shield the surface during curing.
- Avoid application below 50°F or above 85°F.
- Protect from precipitation and direct sun.
- Monitor humidity levels.
Smart timing is crucial for a flawless, durable finish.
Misjudging the Repair Scope
An exterior concrete leveling compound is not designed for structural repairs or deep, wide cracks. Using it on serious damage can mask underlying issues, leading to repeat problems or even safety hazards. Failing to address drainage or substrate movement will also reduce the lifespan of your repair.
Always assess the area before starting. If you notice major cracks, shifting slabs, or persistent drainage issues, consult a professional. Leveling compounds are best for surface repairs and minor unevenness.
- Inspect for structural defects.
- Resolve drainage first.
- Know when to call an expert.
Careful assessment prevents wasted effort and keeps your repair lasting longer.
Maintenance and Longevity of Leveled Concrete Surfaces
Preserving your investment in an exterior concrete leveling compound starts with a smart maintenance routine. Regular attention keeps surfaces looking fresh and functioning safely, while also extending their usable life. Here’s how homeowners can maximize results and spot issues early.
Regular Cleaning and Inspection
Routine cleaning is essential for any surface treated with an exterior concrete leveling compound. Sweep or hose down your patio or walkway at least once per month to prevent debris buildup and staining. For stubborn dirt, a mild detergent and soft brush will suffice.
Conduct a visual inspection every season. Look for early signs of cracks, pooling water, or uneven spots. Addressing minor issues promptly helps prevent larger problems down the line. Keep a basic maintenance kit handy, including a broom, hose, and non-abrasive cleaner.
Staying proactive with cleaning and inspections ensures your exterior concrete leveling compound continues delivering both safety and curb appeal.
Protection Against Weather and Wear
Weather extremes and heavy use can challenge even the best exterior concrete leveling compound. To defend against freeze and thaw cycles, consider applying a high-quality sealer after curing. Sealing adds a protective barrier that reduces moisture penetration and surface wear.
For patios that double as entertainment spaces, or if you plan to add overlays, explore Balcony and patio flooring options that work well with leveled concrete. These solutions can further protect the surface while enhancing appearance.
Compare the difference:
| Protection Method | Average Lifespan (Years) |
|---|---|
| Unsealed | 3–5 |
| Sealed | 5–8 |
Simple steps like sealing and covering make a significant difference in how long your exterior concrete leveling compound will last.
Recoating and Touch-Ups
Even with diligent care, surfaces may eventually need touch-ups. Recoating an exterior concrete leveling compound is straightforward when minor wear or isolated cracks appear. Clean the area thoroughly, apply a compatible primer, and then use the same type of compound for spot repairs.
For widespread wear, consider resurfacing the entire area. Always follow manufacturer guidelines for reapplication intervals, which typically recommend reassessment every 3 to 5 years.
Regular spot repairs and timely recoating help maintain both the integrity and appearance of your leveled surface, maximizing the value of the exterior concrete leveling compound.
Signs It’s Time for Replacement
Despite best efforts, there comes a time when replacement is necessary. Watch for deep cracks, extensive spalling, or persistent unevenness that cannot be resolved by patching. Loss of adhesion or visible delamination are also clear indicators.
Industry data from 2023–2024 shows that the average lifespan of a properly maintained exterior concrete leveling compound is 5 to 7 years. If your surface consistently shows significant defects, investing in a new application or exploring alternative solutions is wise.
Recognizing these signs early allows you to plan for replacement before safety or property value is compromised.

