
Transform your patio into an outdoor oasis with the right tile installation. Outdoor living spaces are more popular than ever in 2025, but many homeowners struggle with patio tile installation challenges like uneven surfaces, poor drainage, or choosing the wrong materials.
This expert guide delivers step-by-step advice to help you achieve flawless patio tile installation, ensuring your space is both stylish and durable. Discover how to select the best tiles, properly prepare your patio, install with precision, and maintain your investment for years of enjoyment.
Follow this comprehensive guide to achieve professional results and lasting satisfaction.
Understanding Patio Tile Options for 2025
Choosing the right materials is the foundation of any successful patio tile installation. As outdoor living spaces take center stage in 2025, understanding your tile options is essential for both performance and style. Here, we break down tile types, standards, sustainability features, and the latest design trends to help you make informed decisions for your outdoor space.

Types of Patio Tiles
Modern patio tile installation projects offer a wide variety of materials, each with unique benefits and ideal applications. The most popular options include porcelain, ceramic, natural stone, composite, and concrete tiles.
A quick comparison of key characteristics is shown below:
| Tile Type | Durability | Slip Resistance | Water Absorption | Noteworthy Feature |
|---|---|---|---|---|
| Porcelain | Excellent | High | Very Low | Frost resistant, ideal for cold areas |
| Ceramic | Good | Medium | Moderate | Budget friendly, wide color range |
| Natural Stone | Varies | High | Low to Medium | Unique patterns, upscale appearance |
| Composite | High | High | Low | Eco-friendly, fade resistant |
| Concrete | Very High | High | Low | Customizable, durable for heavy use |
Porcelain tiles stand out for their frost resistance, making them a top choice for Canadian climates where freeze-thaw cycles are common. Composite tiles are gaining attention due to their sustainability and weather resistance.
Trends for 2025 include modular tile systems that allow creative layouts and large-format tiles offering a sleek, seamless look. For more details on selecting the best tile for your project, visit the Best Tiles for Outdoor Patio guide.
Tile Ratings and Standards
Every patio tile installation should meet or exceed the latest industry standards to ensure safety and longevity. Slip resistance is measured by the coefficient of friction (COF) rating, which has seen updated requirements in 2025 to enhance outdoor safety.
Frost resistance is another critical factor, especially for patios exposed to harsh winters. Tiles should also be rated for abrasion and wear, with grades provided by ANSI and ASTM standards. Always verify that your chosen tiles are certified for exterior use and meet the latest slip resistance and durability benchmarks.
Sustainability and Eco-Friendly Choices
Sustainability is now a top priority in patio tile installation. Many manufacturers offer tiles made from recycled materials or produced using low-emission processes. Look for certifications such as GreenGuard and LEED in 2025, which indicate that the tiles meet strict environmental and indoor air quality criteria.
Recycled glass tiles are an innovative option, providing vibrant color and a unique finish while supporting eco-friendly building practices. Composite tiles often incorporate recycled wood fibers or plastics, further reducing environmental impact. Always verify material origin and environmental certifications before making a selection.
Style and Design Trends
Patio tile installation in 2025 is all about blending function with personal style. Popular colors range from soft neutrals and natural earth tones to bold charcoals and deep greens. Textured finishes, such as wood-look planks and stone-inspired surfaces, are in high demand for their realistic appearance and slip resistance.
Patterns like herringbone, chevron, and modular grids are being used to create visual interest and integrate seamlessly with landscaping and outdoor furniture. The market is shifting toward customizable solutions, allowing homeowners to mix materials and finishes for a truly unique outdoor retreat.
Personalization is key, with many tile systems offering interchangeable pieces for creative layouts. These trends ensure that your patio tile installation not only performs well but also reflects your individual taste and complements your home’s architecture.
Pre-Installation Planning and Preparation
Before starting any patio tile installation, careful planning and preparation are essential for long-term success. This phase lays the foundation for a durable, stylish outdoor space that will withstand the elements and daily use. By addressing each step methodically, you can avoid common pitfalls and ensure that your patio tile installation delivers outstanding results.
Assessing Your Patio’s Condition
Start your patio tile installation by thoroughly inspecting the existing surface. Look for visible cracks, signs of structural movement, or drainage problems. These issues, if left unaddressed, often lead to premature tile failure.
According to industry research, up to 70 percent of outdoor tile failures stem from inadequate substrate preparation. Check for previous repairs and saw cuts, and ensure any expansion joints are still functioning. Evaluate the patio’s slope and drainage to prevent water accumulation under the tiles.
If you spot cracks or repairs, document their locations and decide if additional reinforcement is required. Diagnosing these problems early helps you avoid costly mistakes and ensures your patio tile installation will stand the test of time.
Climate and Environmental Considerations
Climate plays a crucial role in every patio tile installation. Assess whether your region experiences freeze-thaw cycles, heavy rainfall, or intense sunlight. These factors impact tile selection and installation materials.
For colder climates, choose frost-resistant tiles and mortars to prevent cracking during winter. In areas prone to windblown rain, slip resistance becomes a top priority for safety. UV exposure can fade some tile types, so opt for UV-stable finishes if your patio receives direct sunlight.
Regional recommendations matter. For example, patios in coastal areas may need salt-resistant materials, while those in humid zones require effective moisture barriers. Considering these environmental factors ensures your patio tile installation remains beautiful and functional year-round.
Tools and Materials Checklist
Gathering the right tools and materials streamlines the patio tile installation process. Essential tools include:
- Tile cutter or wet saw
- Notched trowels and mixing paddles
- Tile spacers and a sturdy level
For materials, stock up on:
- Polymer-modified mortar and grout
- Waterproofing or crack isolation membranes
- Sealant for joints and edges
Don’t forget safety gear. Protect yourself with gloves, eye protection, and kneepads. Investing in quality tools and supplies not only improves efficiency but also enhances the final outcome of your patio tile installation project.
Surface Preparation Steps
Proper surface preparation is the backbone of any successful patio tile installation. Begin by cleaning the concrete slab thoroughly to remove dust, grease, or old adhesive. Scarify the surface using a grinder or wire brush to increase porosity, promoting strong mortar adhesion.
Test the slab for moisture migration. If needed, install a vapor barrier to prevent future issues. Address any cracks or saw cuts by filling them with polymer-modified thin-set, following ANSI A118.15 standards. Apply a primer if recommended by the mortar manufacturer.
This step-by-step approach minimizes the risk of efflorescence or tile lifting due to trapped moisture. For more detailed budgeting and planning advice, consult the Outdoor Tiling Cost Guide to ensure your project stays on track.
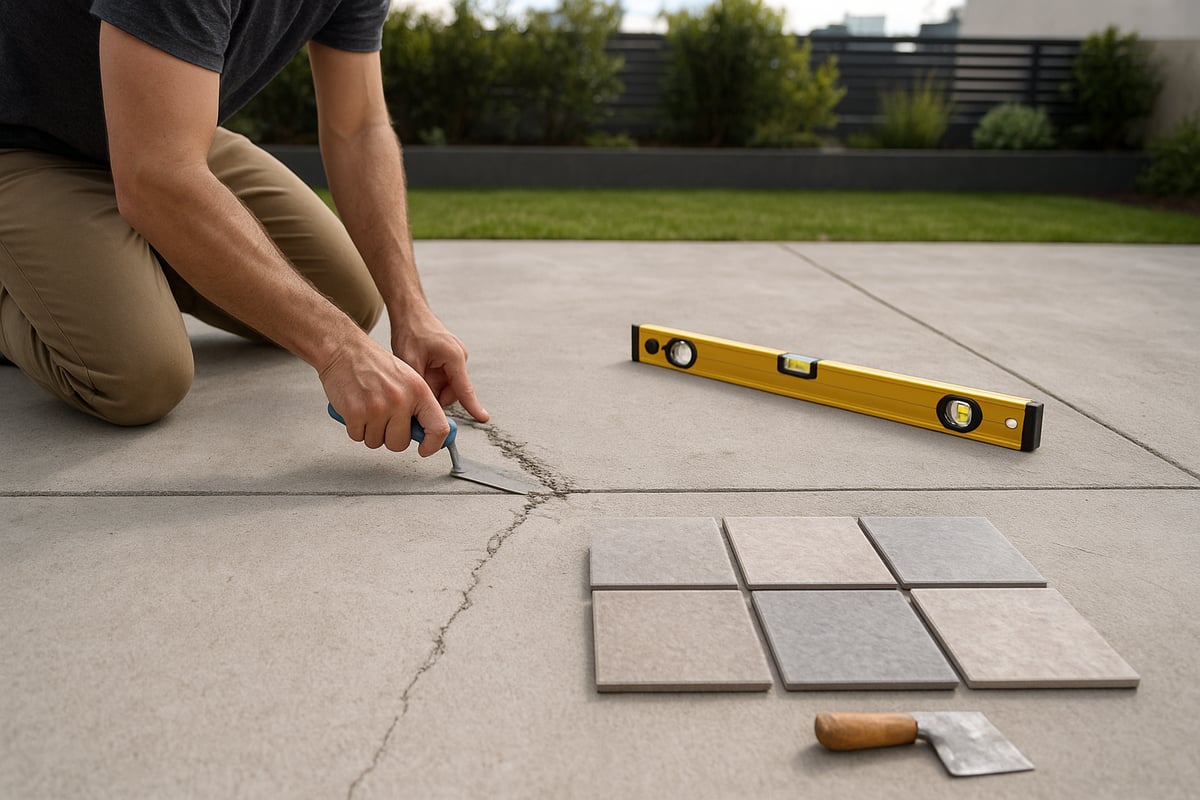
Layout Planning and Movement Joints
Thoughtful layout planning is key to an attractive and resilient patio tile installation. Start by measuring the area and mapping out tile placement to achieve balanced, symmetrical lines with minimal cuts. Dry-lay tiles to visualize the final pattern before setting them in mortar.
Plan for movement joints every 8 to 12 feet and at the patio perimeter. These joints accommodate expansion and prevent cracks caused by temperature changes. Use ASTM C920 traffic-grade sealants and polyethylene backer tape to control joint depth and flexibility.
By integrating movement joints with the substrate’s expansion points, you safeguard your patio tile installation against shifting and weather-related stress. This attention to detail ensures your new outdoor surface delivers lasting beauty and performance.
Step-by-Step Patio Tile Installation Process
Embarking on a patio tile installation requires careful attention to each phase, from substrate protection to the final finishing touches. Following a systematic approach ensures your outdoor space remains stunning and durable for years. Let us walk you through the essential steps for a flawless patio tile installation.

Applying Membranes and Underlayments
The first step in a successful patio tile installation is protecting your substrate. Outdoor patios are exposed to movement, moisture, and temperature swings, making membranes crucial. Start by selecting the appropriate membrane type: crack isolation membranes prevent tile cracks from minor substrate shifts, waterproofing membranes shield against moisture, and uncoupling membranes help absorb expansion and contraction.
Roll out your chosen membrane across the prepared concrete slab, ensuring it covers all joints and saw cuts. For areas with non-structural cracks, overlap the membrane per manufacturer guidelines. Use a suitable adhesive or mortar to bond the membrane securely. Pay special attention to corners and penetrations, where leaks often begin. Properly installed membranes set the stage for a resilient patio tile installation that withstands environmental stresses.
Mixing and Applying Mortar
Choosing the right mortar is essential for outdoor patio tile installation longevity. Most patios benefit from polymer-modified mortars rated ANSI A118.15, which offer flexibility and superior bonding, especially in freeze-thaw zones. Always check the mortar’s compatibility with your tile and membrane.
Begin by reading the manufacturer’s instructions for water-to-mortar ratios. Use a mixing paddle and bucket for consistent results. The mortar should be creamy, not runny, and workable for at least 30 minutes. Spread mortar evenly with a notched trowel, holding it at a 45-degree angle. Comb the mortar into straight lines to ensure full coverage beneath each tile, which is critical for a lasting patio tile installation.
Tile Laying Techniques
Dry-lay a row of tiles first to confirm your layout and minimize awkward cuts at edges. Use spacers between tiles to maintain consistent grout lines. For large-format or wood-look tiles, stagger joints for a natural appearance and to reduce lippage. Press each tile firmly into the mortar, sliding slightly to collapse ridges and ensure full contact.
Check levelness and alignment with a straightedge and bubble level as you progress. Remove excess mortar from joints before it hardens. For advanced techniques and current best practices, consult the 2025 TCNA Handbook for Tile Installation, which offers detailed guidance for every patio tile installation scenario.
Cutting and Fitting Tiles
Precision cutting is vital for a professional patio tile installation finish. Use a wet saw for porcelain and natural stone tiles, as it provides clean, accurate cuts. Snap cutters are suitable for ceramic or smaller tiles. For curved edges or notches around posts, an angle grinder with a diamond blade delivers the best results.
Always wear protective gear, including eye protection and gloves, when cutting tiles. Measure twice before making each cut to avoid waste. Smooth any sharp edges with a rubbing stone. Carefully fit cut tiles into place, ensuring they align with your overall layout and maintain the desired spacing.
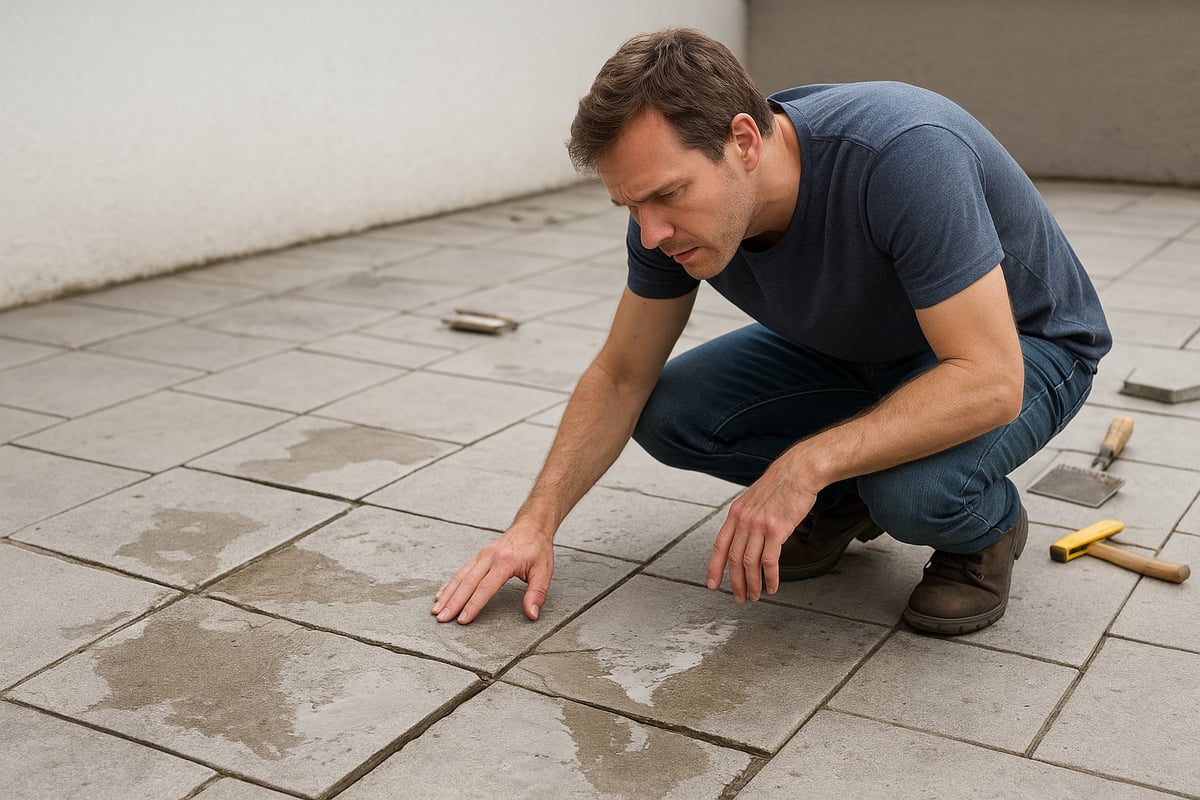
Grouting and Sealing
Once all tiles are set and the mortar has cured, grouting begins. Select a grout compatible with your tile and outdoor conditions, such as cementitious or epoxy grout. Mix grout according to instructions and apply with a rubber float, pressing it firmly into joints. Wipe off excess grout promptly with a damp sponge to prevent haze.
After joints cure, apply a penetrating sealer to both tiles and grout. This step is crucial for stain and moisture resistance, reducing the risk of discoloration and damage. Sealed grout is proven to minimize staining by up to 80 percent, preserving the beauty of your patio tile installation.
Movement Joints and Finishing Touches
To accommodate expansion and contraction, install movement joints at intervals of 8 to 12 feet and along perimeters. Use a traffic-grade, ASTM C920-compliant sealant for these joints, ensuring flexibility and durability. Insert polyethylene backer rod to control joint depth before applying sealant.
Finish your patio tile installation by cleaning all surfaces, removing debris, and performing a final inspection. Confirm that all tiles are secure, joints are sealed, and the patio surface is level. With meticulous attention to these last details, your outdoor space will offer both beauty and resilience for years to come.
Common Mistakes and How to Avoid Them
Mistakes during patio tile installation can lead to costly repairs, premature failure, and safety hazards. Understanding frequent errors and how to prevent them ensures your patio remains durable, beautiful, and functional for years to come.
Inadequate Surface Preparation
One of the most common pitfalls in patio tile installation is neglecting the substrate. When the base is not properly cleaned or scarified, contaminants can block adhesion. Moisture trapped beneath the surface can cause efflorescence, tile lifting, or even mold growth.
- Always test the substrate for porosity and contaminants.
- Remove old adhesives, grease, and dust before tiling.
- Scarify concrete to create a rough, bond-friendly surface.
- Fill any cracks with a polymer-modified thin-set to prevent movement.
Proper surface preparation sets the stage for a successful patio tile installation and can prevent 70% of common failures.
Ignoring Expansion and Control Joints
Overlooking movement joints is another frequent error that leads to cracked or tented tiles. As patios expand and contract with temperature changes, the absence of joints creates stress points.
- Plan for expansion joints every 8 to 12 feet and at all perimeters.
- Use ASTM C920 traffic-grade sealants for flexibility and durability.
- Align joints with existing substrate cracks and saw cuts.
Ignoring this step in patio tile installation can compromise the structural integrity of your outdoor space. Always include perimeter and change-of-plane joints for added protection.
Incorrect Mortar or Grout Selection
Choosing the wrong mortar or grout can result in staining, cracking, or detachment, especially in challenging climates. Non-polymer-modified mortars may not withstand freeze-thaw cycles, while incompatible grout can absorb water and discolor over time.
- Always match mortar and grout to manufacturer recommendations.
- For freeze-thaw zones, use polymer-modified mortars certified by ANSI A108/A118/A136.1:2024 Installation Standards.
- Select grout designed for exterior use and apply a penetrating sealer.
Following current standards is essential for a long-lasting patio tile installation that resists weather and wear.
Poor Drainage and Slope Issues
Improper slope or drainage can cause water to pool, leading to freeze damage, slippery surfaces, and even structural issues. Flat patios are especially vulnerable during heavy rain or snowmelt.
- Ensure a minimum 2% slope away from buildings to promote runoff.
- Inspect for low spots and fill them before tiling.
- Consider trench drains or channel systems for large patios.
Addressing drainage problems during patio tile installation helps prevent costly repairs and prolongs the life of your outdoor living area.
Maintenance and Longevity Tips for Patio Tiles
Keeping your patio looking pristine requires consistent attention and the right approach to maintenance. A well-maintained patio tile installation not only enhances curb appeal but also extends the life of your outdoor space.
Routine Cleaning and Care
Regular cleaning is the foundation of a long-lasting patio tile installation. Use a soft-bristle broom to remove loose dirt and debris. For a deeper clean, mix a pH-neutral cleaner with warm water and mop the surface gently. Avoid harsh chemicals, as they can damage grout and sealants over time.
For stubborn stains, spot-treat with a diluted solution recommended by the tile manufacturer. Rinse thoroughly to prevent residue buildup. High-traffic areas may require more frequent cleaning, especially after heavy rain or gatherings. For more detailed strategies, explore these care tips for weatherproof patio tiles.
Seasonal Maintenance
Changing weather can impact the health of your patio tile installation. At the end of each winter, inspect tiles and grout for cracks, movement, or signs of wear. Early spring is ideal for resealing grout lines and checking expansion joints for flexibility.
Before fall, remove leaves and organic debris that can trap moisture and cause staining. Prepare for freeze-thaw cycles by ensuring tiles and substrate are dry and protected. Consistent seasonal checks help you address small issues before they develop into larger, costly repairs.
Repairing Damaged Tiles and Grout
Over time, even a professional patio tile installation may experience cracked tiles or deteriorating grout. Start repairs by carefully removing damaged tiles with a chisel and mallet, taking care not to harm adjacent pieces. Clean the exposed area thoroughly before applying fresh polymer-modified thin-set mortar.
Replace the new tile, ensuring it is level with the surrounding surface. For grout repairs, use a matching product and fill gaps completely, wiping away excess before it dries. Well-executed repairs restore both appearance and the structural integrity of your patio.
Enhancing Durability and Appearance
Preserve the beauty of your patio tile installation by applying a penetrating sealer every few years. Sealers provide a barrier against stains, moisture, and UV exposure, extending the lifespan of both tiles and grout. Outdoor rugs and furniture pads can protect surfaces from scratches and heavy impact.
Routine sealing has been shown to add more than five years of life to most patio tile installations. By investing in protective measures and periodic upgrades, you ensure your outdoor space remains inviting and resilient for years to come.
Expert Insights and 2025 Innovations in Patio Tile Installation
The world of patio tile installation continues to evolve rapidly, driven by new materials, technology, and environmental demands. In 2025, homeowners and professionals have more choices than ever to create durable, stylish, and sustainable outdoor spaces.
Advanced Materials and Technologies
Major innovations in patio tile installation materials are setting new standards for performance. Next-generation membranes offer superior crack isolation and waterproofing, reducing the risk of tile failure due to substrate movement or moisture. Self-leveling mortars and rapid-setting adhesives now allow for faster, more precise work, even with large-format or textured tiles.
Smart technology is also entering the patio tile installation field. Some manufacturers now offer tiles embedded with LED lighting or sensors, enhancing safety and ambiance for outdoor living. These advancements make it easier to achieve both aesthetic appeal and long-term durability in patio tile installation projects.
Professional Installation vs. DIY
Choosing between professional and DIY patio tile installation depends on several factors. Complex layouts, challenging substrates, or harsh climates often require the expertise of an experienced installer. Data shows that professionally installed patio tile installations experience 30% fewer failures than DIY projects, largely due to better surface preparation and adherence to best practices.
For simpler spaces, confident DIYers can achieve excellent results by following manufacturer guidelines and using proper tools. However, hiring a professional ensures compliance with warranty requirements and access to advanced techniques. Evaluate your skill level and project complexity before deciding on your approach to patio tile installation.
| Aspect | DIY Patio Tile Installation | Professional Patio Tile Installation |
|---|---|---|
| Cost | Lower upfront | Higher, but fewer repairs |
| Time | Longer | Faster completion |
| Failure Rate | Higher | 30% lower failure rate |
| Warranty | Limited or none | Full manufacturer coverage |
Industry Standards and Warranty Considerations
Staying current with industry standards is essential for any patio tile installation. In 2025, updates to ANSI and TCNA guidelines provide clearer requirements for slip resistance, frost resistance, and membrane usage. Following these standards not only ensures safety but also protects your investment.
Manufacturers often require strict adherence to installation protocols for warranty coverage, sometimes offering up to 10 years on labor and materials. For detailed information, consult the ANSI Standards for Tile Installation to make sure your patio tile installation meets the latest specifications. Always document your process to support any future warranty claims.
Sustainable and Smart Outdoor Spaces
Sustainability is a major trend influencing patio tile installation. Eco-friendly products, such as recycled glass and low-emission tiles, are increasingly popular. Modern systems feature permeable surfaces that improve drainage and reduce runoff, supporting sustainable landscaping practices.
Smart technology is also transforming patio tile installation. Solar-powered lighting, integrated water management, and app-controlled features are now available for outdoor spaces. These innovations make patios not only beautiful but environmentally responsible and convenient for homeowners.
Why Choose Skyscapes for Outdoor Tile Solutions
When it comes to expert patio tile installation, Skyscapes stands out for its commitment to quality and innovation. Their luxury modular flooring systems are engineered specifically for patios, balconies, and rooftops, with a focus on Canadian climates and urban living.
Skyscapes offers a full-service approach, from design consultation to material selection and professional installation. Homeowners, builders, and architects trust Skyscapes for premium porcelain, composite, and hardwood tiles that deliver lasting performance. For those seeking a custom patio tile installation with guaranteed durability and style, Skyscapes is the proven choice.

