
Outdoor living spaces are quickly transforming, with homeowners seeking innovative ways to enhance patios, walkways, and gardens. In 2025, pebble flooring outdoor stands out as a top solution for creating stylish, long-lasting, and sustainable surfaces.
This expert guide will show you how pebble flooring outdoor can bring beauty and durability to your exterior spaces. Our insights help you choose eco-friendly options that blend seamlessly with any landscape.
Explore the benefits of pebble flooring outdoor, essential design tips, a step-by-step installation process, low-maintenance strategies, and the latest trends for 2025.
Ready to upgrade your space? Discover why pebble flooring outdoor is the smart choice this year, and get inspired to start your own project.
Why Choose Pebble Flooring for Outdoor Spaces?
Outdoor living areas demand materials that balance beauty, durability, and practicality. Pebble flooring outdoor solutions are gaining popularity for their remarkable ability to meet these needs. Let us explore why this flooring type is drawing attention from homeowners and designers alike.
Versatility in Design and Application
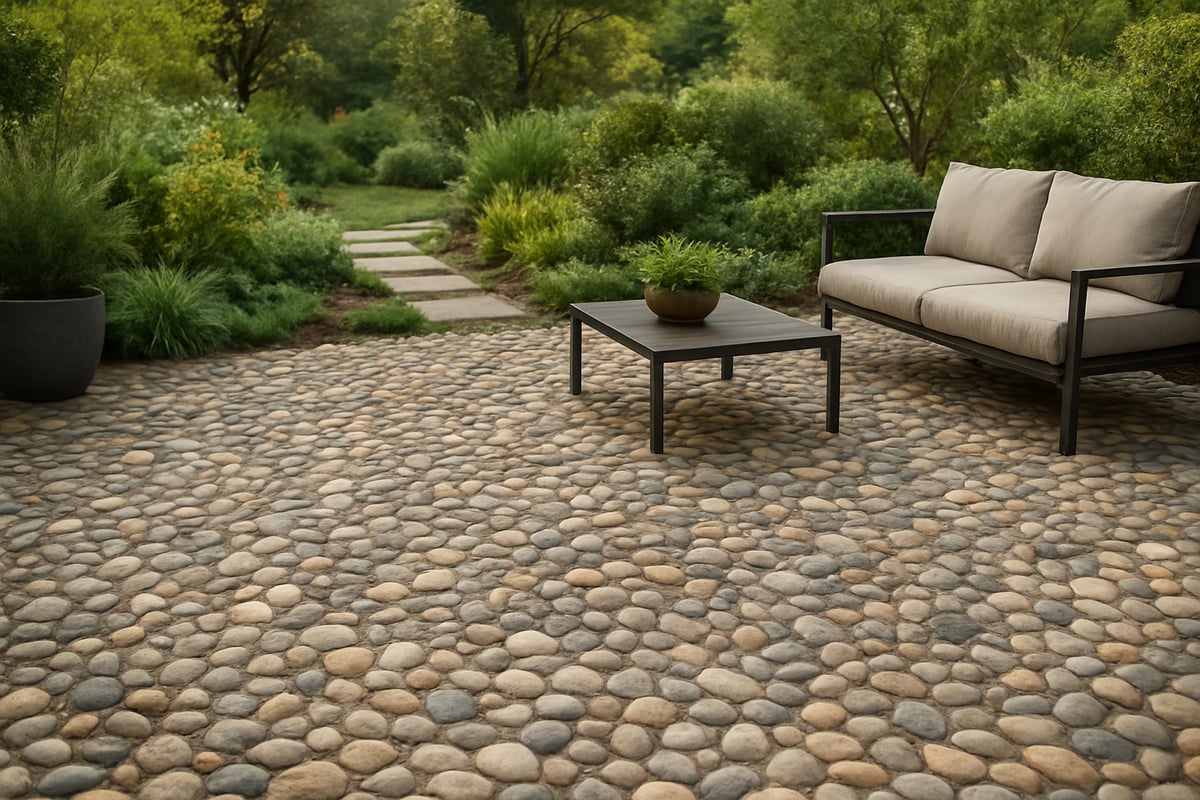
Pebble flooring outdoor surfaces offer unmatched versatility, allowing you to craft unique looks for patios, walkways, pool areas, and garden paths. The wide range of available colors, shapes, and pebble sizes means you can customize patterns to suit any landscape or architectural style. Whether you prefer intricate mosaics or simple, natural arrangements, pebbles adapt beautifully to your vision.
This flexibility also extends to blending pebble flooring outdoor seamlessly with your existing hardscape or softscape designs. For a deeper look at customization and material options, visit the Pebble flooring product overview page.
Durability and Weather Resistance
One of the key strengths of pebble flooring outdoor applications is their exceptional durability. These surfaces are engineered to withstand heavy foot traffic, making them ideal for busy patios and entryways. With proper installation, pebbles remain stable and resist shifting.
Pebble flooring outdoor also excels in weather resistance. Non-slip textures provide safety in wet conditions, while UV-resistant sealers protect against fading and discoloration. Even in climates with harsh winters or intense sun, well-sealed pebbles retain their appearance and function for years.
Eco-Friendly and Sustainable Benefits
Sustainability is a major advantage of pebble flooring outdoor installations. Many options use natural or recycled pebbles, minimizing the need for new raw materials and reducing environmental impact. Choosing permeable pebble systems supports responsible water management by allowing rainwater to drain through, reducing runoff and erosion.
By selecting locally sourced or recycled materials, you further decrease transportation emissions and promote eco-friendly landscaping. These choices align with the growing demand for green building practices in outdoor design.
Cost-Effectiveness Compared to Alternatives
Pebble flooring outdoor provides significant cost savings compared to traditional materials like natural stone slabs or concrete pavers. The initial installation costs are often lower, especially for DIY-friendly systems. Maintenance expenses remain minimal because pebble surfaces are resilient and easy to clean.
Another financial benefit is longevity. Pebble flooring outdoor installations have a longer lifespan, which reduces the need for frequent replacements. Over time, this translates into substantial savings for both residential and commercial properties.
Health and Comfort Features
Comfort is a crucial consideration for any outdoor surface. Pebble flooring outdoor delivers a gentle, natural feel underfoot that is softer than standard concrete or tile. This makes it especially pleasant for barefoot areas around pools or garden paths.
Additionally, the natural stone composition of pebble flooring outdoor helps keep surfaces cooler during hot summer months. The organic texture also improves slip resistance, adding an extra layer of safety for families and guests.
Relevant Statistics and Examples
Market trends show that demand for outdoor flooring is projected to grow by 6 percent in 2025, reflecting a shift toward stylish and sustainable options like pebble flooring outdoor. For example, a residential project in Vancouver adopted this solution for a backyard walkway and reported a 30 percent reduction in annual maintenance costs compared to traditional hardscapes.
These real-world results highlight the value and practicality of pebble flooring outdoor for today’s evolving outdoor spaces.
Key Considerations Before Installing Pebble Flooring Outdoors
Transforming your exterior with pebble flooring outdoor solutions requires careful planning. Each step, from evaluating your site to selecting the right materials, can influence the final look, functionality, and longevity of your surface. Let’s break down what you need to consider before you begin your project.
Site Assessment and Preparation
Start with a thorough assessment of your outdoor area. Check the stability of the ground and identify any drainage issues. Look for existing slopes or areas where water tends to pool, as these can affect the success of pebble flooring outdoor installations.
It is also important to observe the amount of sun exposure and shade throughout the day. These factors will help you determine the best materials and installation techniques for your climate. Proper preparation at this stage prevents future problems and ensures a lasting result.
Material Selection: Pebble Types and Sourcing
Choosing the right materials is key for a resilient and attractive pebble flooring outdoor surface. Options like river rock, polished pebbles, and eco-friendly recycled stones each offer unique textures and colors. Consider sourcing from local suppliers to reduce costs and environmental impact.
For more design inspiration and practical advice on selecting suitable materials, explore Backyard tile flooring ideas. This resource helps you compare various tile and pebble combinations to complement your project’s style.
Budget Planning and Cost Breakdown
Set a realistic budget by considering several factors: the size of your area, the type of pebbles you choose, and the complexity of the installation. On average, pebble flooring outdoor projects range from $8 to $15 per square foot, depending on material quality and labor.
Be sure to account for additional expenses like binders, sealers, and any required base layers. Planning ahead allows you to avoid surprises and make informed decisions about where to invest for the best value.
Design and Aesthetic Choices
Your pebble flooring outdoor surface can become a design focal point. Experiment with patterns such as mosaics, borders, or geometric shapes. Use color strategically, coordinating with existing outdoor furniture and surrounding landscaping.
Visual mock-ups or digital tools can help you preview different combinations before installation. This approach ensures your design not only enhances curb appeal but also reflects your personal taste and fits the overall outdoor theme.
Permits, Codes, and HOA Regulations
Before installation, check local building codes and your homeowner association’s rules. Some areas may have accessibility or slip-resistance requirements for pebble flooring outdoor surfaces. Obtaining the right permits early will help you avoid project delays and ensure compliance with all safety standards.
If you’re unsure, consult with a local contractor or building official. Investing time in this step protects your investment and gives you peace of mind.
Timeline and Project Planning
Plan your pebble flooring outdoor project around weather and seasonal conditions. For a 200 square foot area, expect the process to take between two to five days. Unpredictable weather can affect curing times for binders or sealers, so always build in flexibility.
Map out each phase, from site preparation to final sealing. Clear scheduling keeps your project on track and minimizes disruption to your outdoor space.
Real-World Example
Consider a Toronto homeowner who recently installed a 300 square foot pebble patio. They began by reviewing city permit requirements and working closely with local authorities. This proactive approach ensured their pebble flooring outdoor project met all regulations and avoided costly setbacks.
By carefully planning each step, the homeowner achieved a seamless, attractive result that enhanced both the beauty and function of their backyard.
Step-by-Step Guide: Installing Pebble Flooring Outdoors
Transforming your outdoor space with pebble flooring outdoor is a rewarding project that combines durability, beauty, and sustainability. Whether you are creating a serene garden path or a stylish patio, careful planning and methodical execution are essential for success.
Planning and Measuring the Area
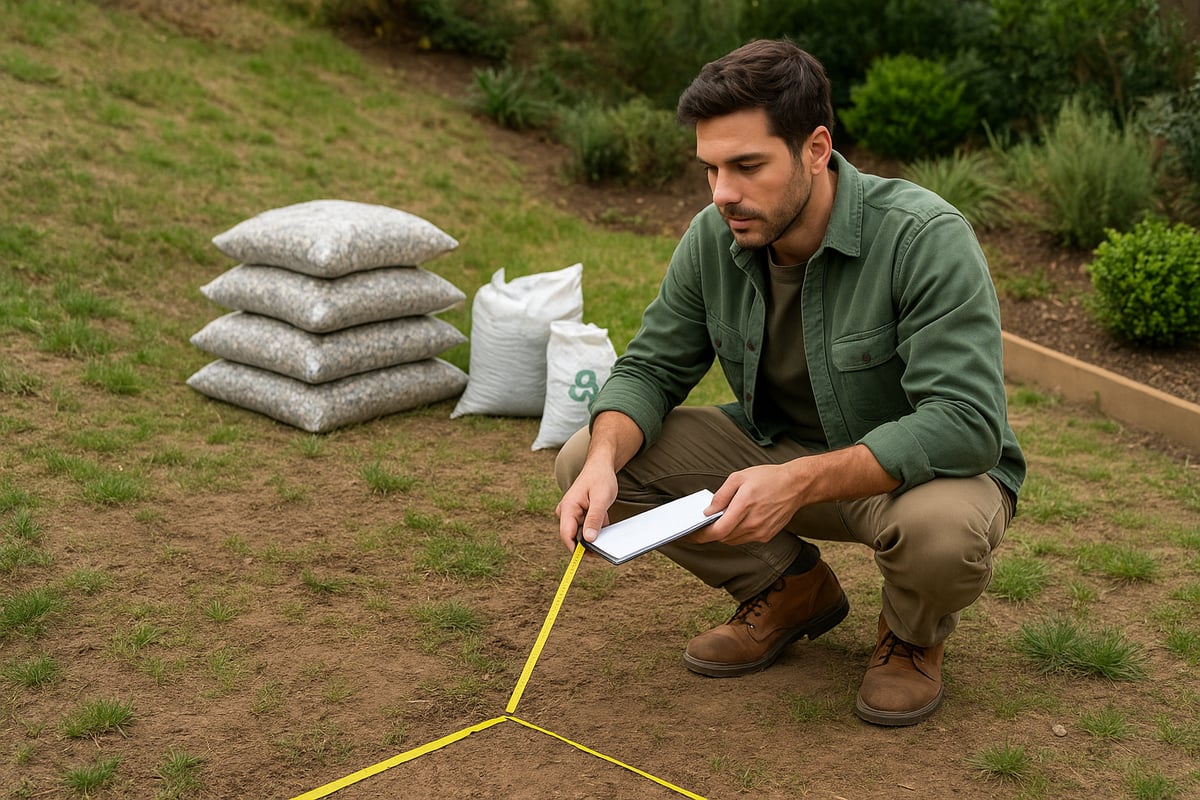
Begin your pebble flooring outdoor project by clearly defining the space you want to enhance. Use stakes and string to mark the boundaries of the area. Measure the length and width to calculate the square footage and determine the amount of materials required.
Sketch a layout that reflects your desired patterns or borders. Consider how the pebble flooring outdoor will interact with existing landscaping and outdoor features. Accurate planning at this stage ensures you order the right quantity of pebbles, binder, and other supplies.
- Mark boundaries with string or chalk.
- Measure dimensions and calculate total area.
- Plan for patterns, borders, or transitions.
Mapping out these details helps avoid costly errors and ensures your pebble flooring outdoor fits seamlessly into your space.
Ground Preparation and Base Layer
Proper ground preparation is the foundation of long-lasting pebble flooring outdoor. Start by excavating the marked area to a depth of 2 to 4 inches, depending on your site’s needs and expected foot traffic. Remove all grass, roots, and debris to create a clean surface.
Next, lay a geotextile fabric to prevent weed growth and improve stability. Add a 2 to 3 inch layer of compacted gravel or sand, ensuring it is level and well-drained. This base layer supports your pebble flooring outdoor, preventing shifting and settling over time.
- Excavate area to recommended depth.
- Install geotextile fabric.
- Add and compact gravel or sand base.
A solid, level base is crucial for a smooth, durable pebble flooring outdoor installation.
Mixing and Applying the Binder
The binder is what holds your pebbles together and secures them to the base. Choose between epoxy resin, cement-based, or eco-friendly binders based on your climate, traffic levels, and environmental goals. Always refer to the manufacturer’s mixing ratios for best results.
In a clean mixing container, combine the binder and hardener (if using epoxy) or water (for cement-based products). Mix thoroughly until the consistency is uniform. Pour the binder over a manageable section of your prepared base, spreading it evenly with a trowel.
For more detailed guidance, consult Pebble Tile Installation Guidelines, which provides step-by-step instructions and helpful visuals.
- Select appropriate binder type.
- Mix binder according to instructions.
- Apply binder in sections to prevent premature setting.
Taking care with this step ensures your pebble flooring outdoor remains stable and attractive.
Laying the Pebbles
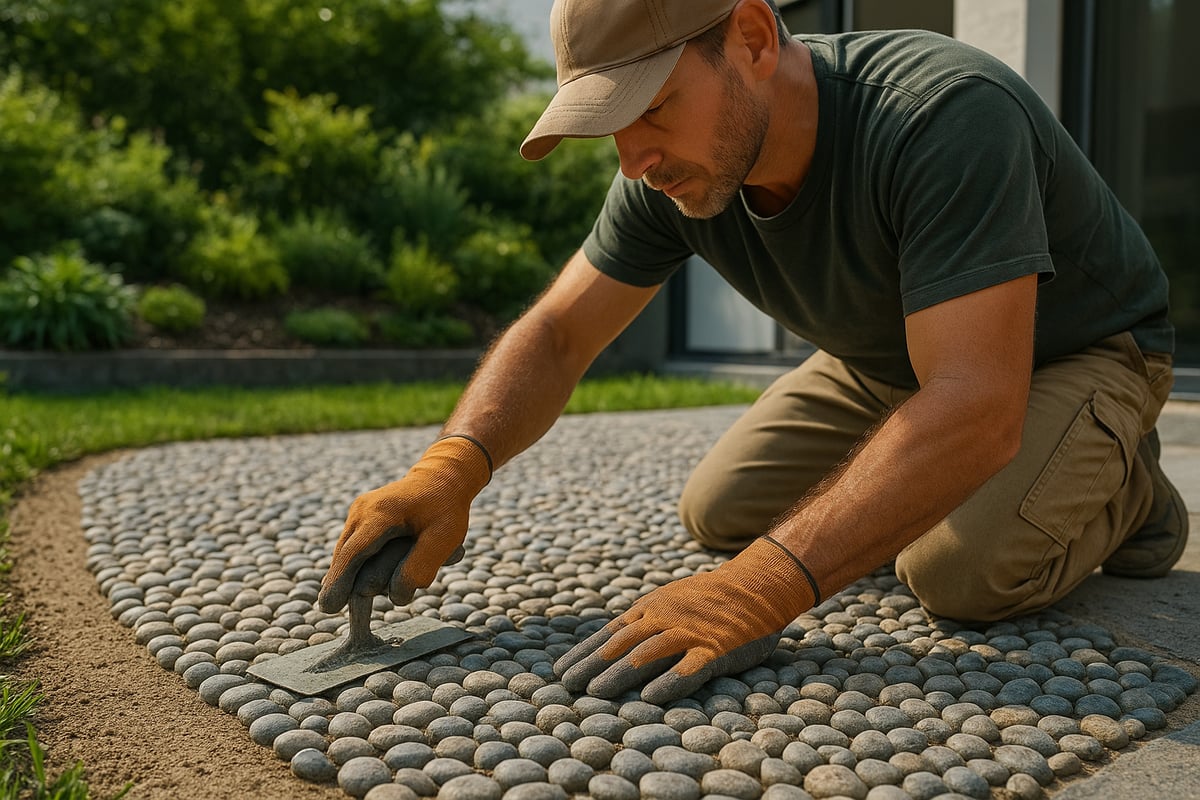
Begin laying your pebbles while the binder is still workable. Spread pebbles evenly across the surface, using your planned layout as a guide. Press each pebble gently into the binder, ensuring a uniform surface and good adhesion.
Work in small sections to maintain control over the pattern and to avoid the binder drying before pebbles are set. Create borders or inlays as desired, using contrasting colors or shapes to enhance the design of your pebble flooring outdoor.
- Spread pebbles evenly over binder.
- Press pebbles firmly for secure hold.
- Follow layout for patterns and borders.
Consistent placement results in a seamless, professional-looking pebble flooring outdoor installation.
Smoothing and Leveling the Surface
Once all pebbles are laid, use a trowel or float to smooth the surface. Check for any dips, bumps, or uneven spots, adjusting as needed to maintain a flat, comfortable walking area.
Gently tap loose stones into place and sweep off excess binder before it hardens. This step ensures your pebble flooring outdoor is both visually appealing and safe for foot traffic.
- Use trowel or float to level pebbles.
- Check for uneven areas.
- Remove excess binder promptly.
A smooth, level finish is key to the longevity and comfort of your pebble flooring outdoor.
Curing and Sealing
Allow your new surface to cure undisturbed. Curing times will vary depending on binder type, but generally range from 24 to 72 hours. Avoid walking on the pebble flooring outdoor during this period to prevent marks or shifting.
After curing, apply a UV-resistant sealer to protect the surface from sun damage and enhance color vibrancy. Use a roller or sprayer for even coverage, and allow the sealer to dry fully before use.
- Let surface cure for recommended time.
- Apply UV-resistant sealer.
- Allow sealer to dry before heavy use.
Proper curing and sealing extend the life and beauty of your pebble flooring outdoor.
Final Inspection and Cleanup
Before enjoying your new space, perform a thorough inspection. Look for loose pebbles, gaps, or uneven areas and make spot repairs as needed. Clean up all tools and remove any leftover binder before it hardens.
Sweep the surface gently to remove dust or debris. This final step ensures your pebble flooring outdoor is ready for daily enjoyment and safe for all users.
- Inspect for imperfections.
- Make any necessary repairs.
- Clean tools and sweep surface.
Taking time for a detailed inspection pays off in long-term satisfaction.
Example: Chronological Walkthrough of a 400 sq. ft. Pebble Walkway Installation
To illustrate the process, consider a recent 400 sq. ft. pebble walkway project. The homeowner started by staking out the path, measuring dimensions, and ordering materials for the pebble flooring outdoor.
Excavation and base preparation took one day, with gravel and geotextile fabric installed for drainage and stability. On day two, the binder was mixed and spread in four manageable sections. Pebbles were arranged according to a mosaic pattern, with borders added for visual interest.
Smoothing, leveling, and cleanup followed on the third day. After a 48-hour cure, the surface was sealed and inspected. The result was a visually stunning, durable pebble flooring outdoor walkway that blended seamlessly into the landscaped garden, offering both form and function.
Maintenance and Longevity: Keeping Pebble Flooring Looking Its Best
Maintaining the appeal and functionality of pebble flooring outdoor is essential for long-term satisfaction. With proper care, these surfaces stay vibrant, safe, and comfortable for years. This section covers the essential cleaning routines, issue prevention strategies, protection tips, and seasonal guidance you need. Whether you are a homeowner or a professional, following these practices ensures your pebble flooring outdoor remains a beautiful and durable feature.
Routine Cleaning Practices
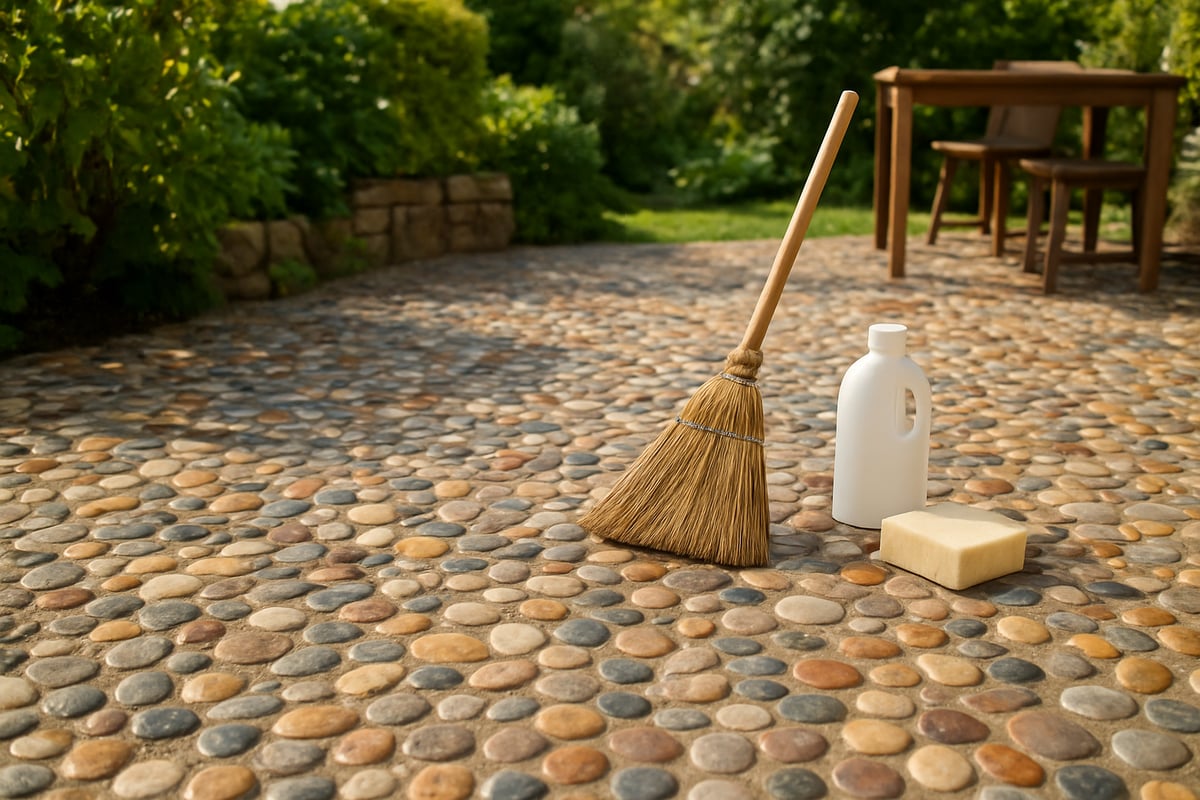
Regular cleaning is the foundation of lasting pebble flooring outdoor. Begin by sweeping debris like leaves and dirt at least once a week. Use a soft-bristle broom to avoid scratching the pebbles or dislodging the binder. For deeper cleaning, wash the surface with a mild detergent and water, using a gentle brush for stubborn spots. Avoid harsh chemicals, as they can degrade the binder and affect the natural stone’s luster.
For detailed step-by-step instructions, you can consult this Pebble Tile Care and Maintenance guide to ensure your pebble flooring outdoor receives optimal care.
Addressing Common Issues
Even with diligent care, pebble flooring outdoor may encounter common issues. Loose or missing pebbles should be repaired promptly using spot treatments with compatible binder and matching stones. If you notice mold or algae, especially in shaded or damp areas, use a specialized outdoor cleaner that is safe for natural stone. Prevent weeds by keeping joints clean and applying a weed inhibitor as needed. Early intervention helps maintain both appearance and safety.
Re-Sealing and Surface Protection
Protecting pebble flooring outdoor with a quality sealant is key to longevity. Reapply a UV-resistant sealant every two to three years, or as recommended for your climate and usage. Sealants guard against fading, water infiltration, and surface wear. Choose products specifically formulated for outdoor use and compatible with your binder type. Apply during dry, mild weather for best results. Proper sealing preserves color and enhances the natural look of your pebble flooring outdoor.
Seasonal Care Tips
Adapt your maintenance routine for each season to extend the life of pebble flooring outdoor. In winter, prevent freeze-thaw damage by ensuring proper drainage and removing ice with plastic tools instead of metal. Avoid de-icing salts that can harm stone and binder. In summer, protect against intense sun exposure by keeping the area clean and resealing if colors appear faded. Seasonal care ensures your pebble flooring outdoor withstands environmental challenges year-round.
Enhancing Longevity
To maximize the lifespan of pebble flooring outdoor, schedule regular inspections. Look for signs of wear, loose stones, or binder deterioration. Address repairs immediately to prevent small problems from escalating. In high-traffic areas, consider using outdoor mats or runners for added protection. Prompt action and preventive measures keep your pebble flooring outdoor looking its best, reducing long-term maintenance costs.
Statistics and Data
Well-maintained pebble flooring outdoor can last 15 to 20 years, according to industry data. Annual cleaning and sealing have been shown to reduce algae growth by up to 40 percent, minimizing slip hazards and preserving surface integrity. For example, a homeowner who followed a consistent maintenance plan saw a significant reduction in repair expenses over five years. These results highlight the value of proactive care for pebble flooring outdoor.
Design Trends and Innovations in Outdoor Pebble Flooring for 2025
The world of pebble flooring outdoor design is rapidly evolving, promising homeowners and designers fresh possibilities for 2025. With a focus on aesthetics, sustainability, and technology, new trends are shaping how these surfaces enhance patios, walkways, and gardens.
Trending Colors, Patterns, and Layouts
In 2025, neutral and earth-inspired palettes are dominating pebble flooring outdoor projects. Homeowners are gravitating toward soft grays, sandy beiges, and subtle greens, creating spaces that blend effortlessly with nature. Mosaic patterns and geometric layouts are making a significant impact, allowing for both traditional and contemporary expressions.
Designers increasingly use bold borders and intricate inlays to define zones and add visual interest. These creative approaches help pebble flooring outdoor installations stand out, offering a unique alternative to conventional stone or tile. For a deeper dive into current styles, review Outdoor Flooring Trends for 2025, which highlights the rise of natural textures and sustainable materials.
Sustainable and Eco-Friendly Innovations
Sustainability is at the forefront of pebble flooring outdoor advancements. The use of recycled glass and composite pebble blends is growing, providing eco-conscious alternatives without sacrificing durability. Many new systems are designed to be permeable, supporting stormwater management and reducing environmental impact.
Local sourcing of pebbles is also gaining traction, minimizing transportation emissions and supporting regional economies. These innovations ensure that pebble flooring outdoor solutions not only look beautiful but also align with green building goals.
Integration with Smart Outdoor Spaces
Smart technology is seamlessly merging with pebble flooring outdoor projects. Designers are embedding LED lighting into pathways and pool surrounds, enhancing both safety and ambiance. Outdoor heating elements are being installed beneath pebble surfaces, extending usability into cooler seasons.
This integration allows for smooth transitions between indoor and outdoor flooring, creating a cohesive flow throughout the property. Homeowners value the ability to customize lighting schemes, making pebble flooring outdoor installations both functional and visually appealing.
DIY vs. Professional Installation Trends
The DIY movement is influencing pebble flooring outdoor installations, with user-friendly kits and comprehensive video tutorials becoming widely available. These resources empower homeowners to tackle small to medium projects on their own, reducing costs and allowing for personal creativity.
However, for complex designs or large-scale installations, professional services remain in high demand. Experts bring advanced techniques and precision, ensuring longevity and flawless execution for intricate pebble flooring outdoor patterns. This balance between DIY accessibility and professional expertise is shaping the market in 2025.
Customization and Personalization
Bespoke design is a hallmark of modern pebble flooring outdoor projects. Homeowners increasingly request custom patterns, artistic inlays, and accent stones to highlight specific features such as fire pits, garden beds, or water elements.
Material options have expanded, with choices ranging from polished river rock to eco-friendly blends. For those seeking additional inspiration, Outdoor patio stone tile solutions showcases innovative materials and layouts that can be adapted for unique outdoor visions. This emphasis on personalization ensures each pebble flooring outdoor installation reflects the owner’s style and the surrounding environment.
Expert Tips and Common Mistakes to Avoid
Even seasoned DIYers can benefit from expert guidance to ensure the best results with pebble flooring outdoor projects. A strategic approach, attention to details, and learning from real-world experience will help you create a flawless and long-lasting outdoor surface.
Pro Tips for Successful Pebble Flooring Projects
Start your pebble flooring outdoor project on the right foot by preparing a detailed plan. Always test the compatibility of your binder and pebbles before full installation to avoid future issues. Prioritizing proper drainage is crucial to prevent water pooling, which can damage both the surface and underlying layers.
Visualizing your design with small mock-ups allows you to experiment with color and pattern choices. This step helps you achieve the desired aesthetic and reduces surprises during installation. Remember, the foundation is key, so take extra care with site preparation.
Mistakes to Avoid
One of the most common mistakes with pebble flooring outdoor is neglecting ground preparation, which leads to uneven surfaces and premature wear. Underestimating material quantities can result in color mismatches and delays.
Applying sealant too soon or during adverse weather conditions diminishes surface protection and longevity. For a comprehensive overview of pitfalls and professional advice, see these Common Mistakes in Pebble Tile Installation.
Insider Insights from Industry Professionals
Industry professionals recommend sourcing high-quality pebbles from reputable suppliers to guarantee consistency in size and color. When selecting binders and sealers, opt for eco-friendly products that offer durability and environmental benefits for your pebble flooring outdoor project.
Experts also stress the importance of following manufacturer instructions for mixing and curing times. This attention to detail ensures a strong bond and long-lasting results.
Example Scenarios
A homeowner who addressed drainage issues early in their pebble flooring outdoor project avoided costly repairs later. In another case, a DIY enthusiast realized the benefit of creating a pattern mock-up, which helped them select the right color blend before committing to the full installation.
Common pitfalls, such as rushing the curing process or skipping a geotextile layer, can be prevented by following expert guidance and learning from others’ experiences.
Resources for Further Learning
Expand your knowledge of pebble flooring outdoor by consulting reputable installation guides and video tutorials. For ongoing care and maintenance, review these Maintenance tips for outdoor flooring, which cover essential cleaning and protection strategies.
If your project is complex, consider hiring certified professional installers in your area to ensure a flawless finish and lasting durability.

